Explore agent workflows
In the short video, you’ll see how an agent workflow could look like. The user enters a keyword and the agent creates a full blog article draft — ready for review and team notification via Slack:Watch the video to learn how to create a Blog Article Agent.
Before you get started
Before creating your Agent, define the task it should support. These questions will help you structure it effectively:- What’s the Agent’s purpose?
What should it help the user achieve? - What steps are needed?
Break the task into logical stages. - What knowledge is required?
Will the Agent use one file, multiple documents, or examples? - How should users provide input?
Free text, structured forms, or follow-up questions?
You want to build a Blog Article agent. Its goal: create articles based on a keyword and target audience, requests approval and then sends a message via Slack to inform the team. Workflow:
- The user provides a keyword, target audience, and selects the brand voice.
- The agent generates a blog article draft using SEO best practices — including clear structure, keyword integration, and a meta description.
- The agent requests approval from the user.
- Once approved, the agent asks where the article should be shared.
- The user specifies a Slack channel.
- The agent automatically notifies the selected channel about the approved article.
Create an Agent
Go to “Agents” and click “Create Agent”. You’ll have tree options to get started:- Choose a template: Create an agent based on a predefined template. This option is suitable if you want to build on a proven foundation and customize the agent to your brand and requirements.

Agent Templates
- Use Case Finder: Support for discovering suitable AI use cases for everyday work—based on role, industry, and daily tasks. Quickly identifies easy-to-implement use cases and prioritizes them by impact and effort.
- Prompt Optimizer: Get support for creating, refining, and optimizing prompts. Simply choose between Guided Mode (step-by-step), Expert Mode (direct), or Quick Help (optimize an existing prompt).
- nuwacom Expert: Get support for the nuwacom.ai platform—from first steps and features to security and compliance.
- Compliance Checker: The Compliance Checker is an AI assistant that performs fast and reliable text checks. It uses common compliance rules and can be extended with internal compliance policies.
- Social Media Writer: As a social media specialist, I create platform-optimized posts. I use in-depth knowledge of each platform’s specifics (tone, length, hashtags) to deliver impactful and engaging copy.
- Fact Checker: As a fact checker, I verify the accuracy of provided statements. I use comprehensive knowledge and conduct thorough research to deliver reliable information and assessments.
- Speechwriter: This agent helps verify facts and the accuracy of websites and texts. However, it may make mistakes—please review the results.
- Proofreader: This assistant improves your text with clear, constructive feedback—from grammar to style and structure.
- Press Release Agent: Create a press release step by step with this experienced agent.
- Journalist Feedback: This agent helps review and improve texts and communication—from the perspective of an experienced journalist. It provides practical tips on style, clarity, and impact to make content compelling.
- Research Agent: As a highly experienced research assistant, I specialize in supporting structured research of information on the web or within files.
- BFSG Agent: Advisor for the Accessibility Strengthening Act (BFSG) and text optimizer for accessible content in plain language.
- Alt Text Generator for Images: An AI-powered agent for creating accessible and SEO-optimized alternative texts for website images. It works in three steps: image content analysis, contextualization via the website URL, and generation of a concise alt text.
- Response Generator: An intelligent agent that drafts polite responses to all kinds of customer communications, such as emails, reviews, or social media comments.
- Text Advisor: This agent helps improve writing style for any text based on the writing principles of “Wolf Schneider.”
- AI Text Humanizer: I transform AI-generated text into expressive, human-sounding language—precise, empathetic, and finely tuned to each target audience. Using a toolkit of style and emotion, texts sound like they came straight from a bestselling author.
- Briefing Creator: Creating structured briefings for AI and colleagues is easy with this agent. It asks targeted questions, ensures clarity throughout the process, and delivers a professional, well-structured result.
- Social Media Headliner: Creating attention-grabbing and creative social media headlines is effortless with this agent. It analyzes the provided content and generates five alternative suggestions to maximize click-through rate, engagement, and reach.
- Topic Ideas Generator: As a creative genius, I generate five original topic ideas from a main theme—for maximum relevance and engagement.
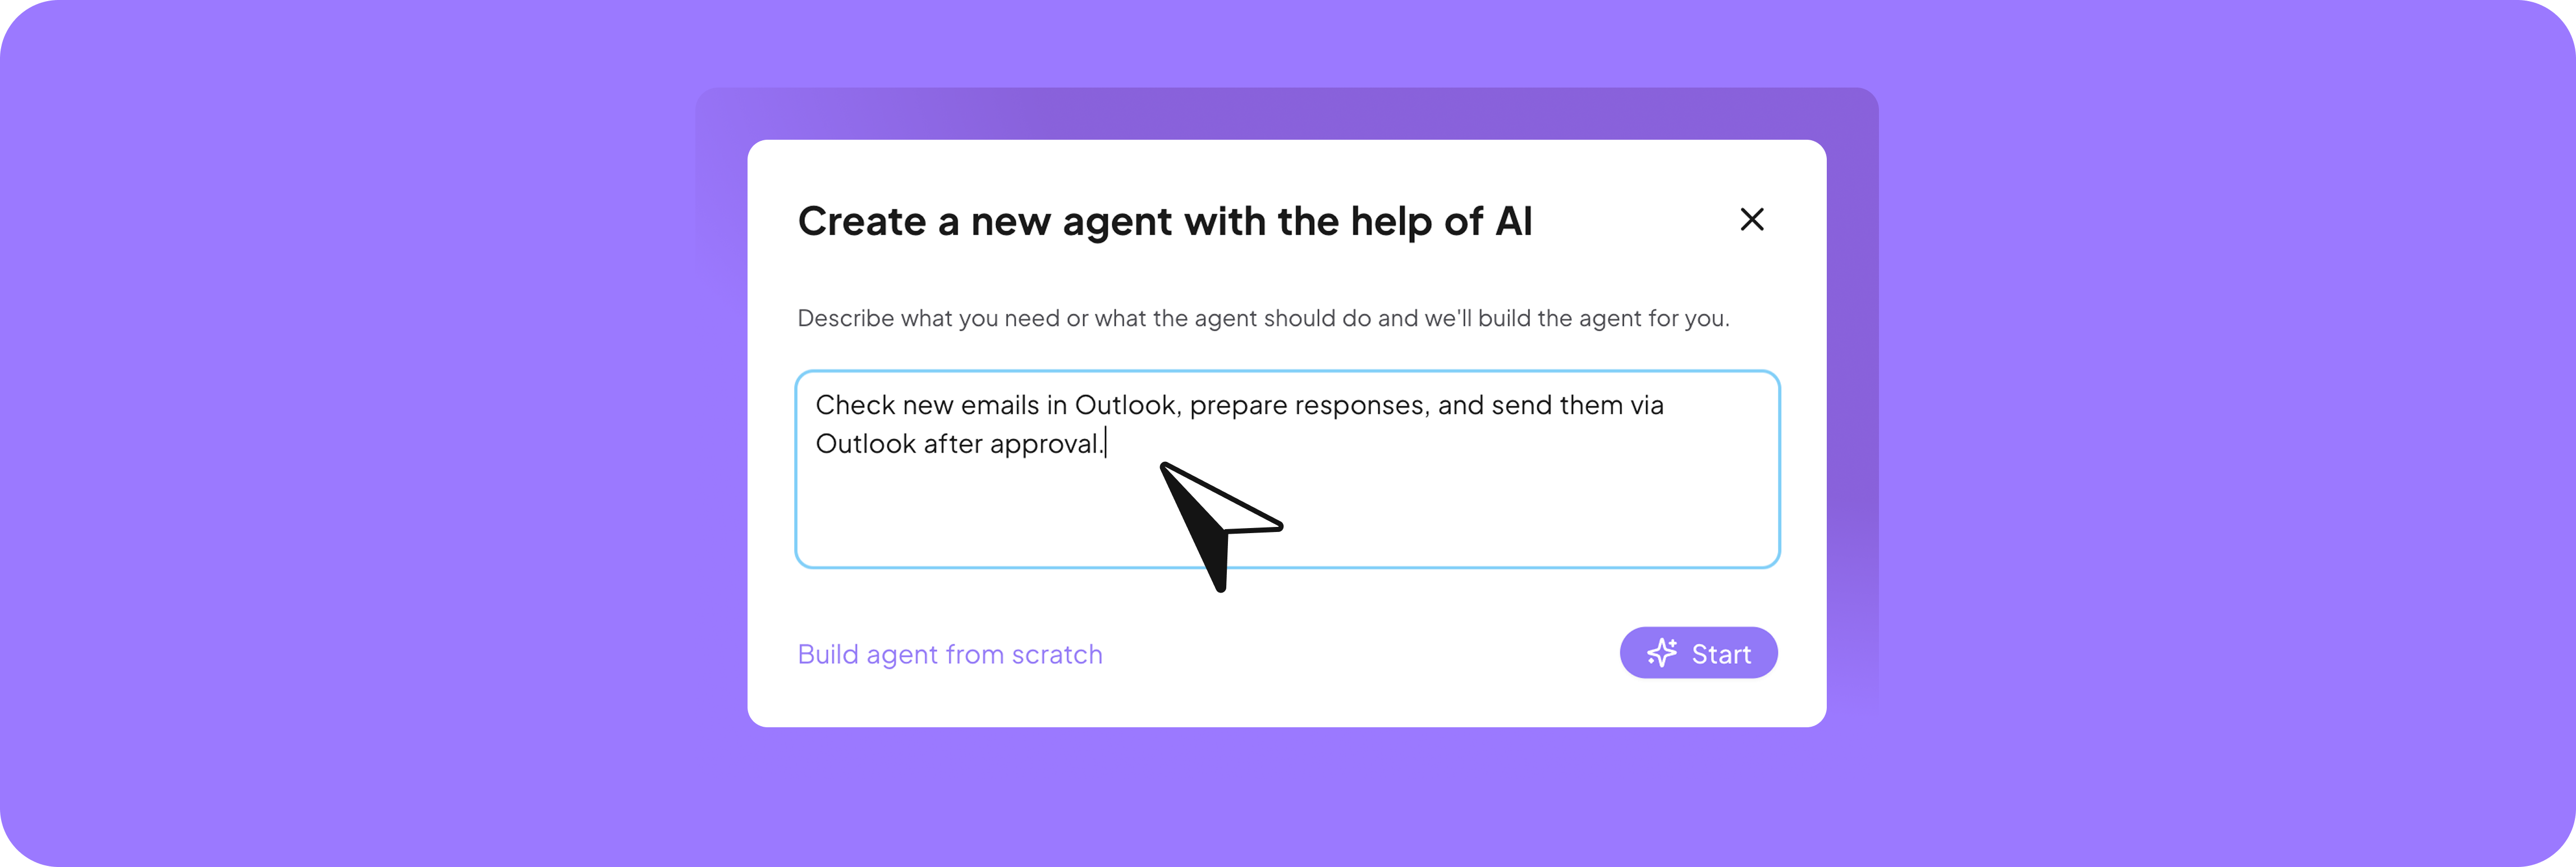
- Create a new agent with the help of AI: Describe what you need or what the agent should do, click “Start” and we’ll build the agent for you. This method is ideal for users who want to save time or need support in phrasing the right instructions for their Agent. Want to adjust something? You can fine-tune every detail manually to match your exact needs.
- Build agent from scratch: Configure your Agent step by step. Define the name, instructions, knowledge, and behavior manually. This option gives you more control and lets you add specific details right from the start.
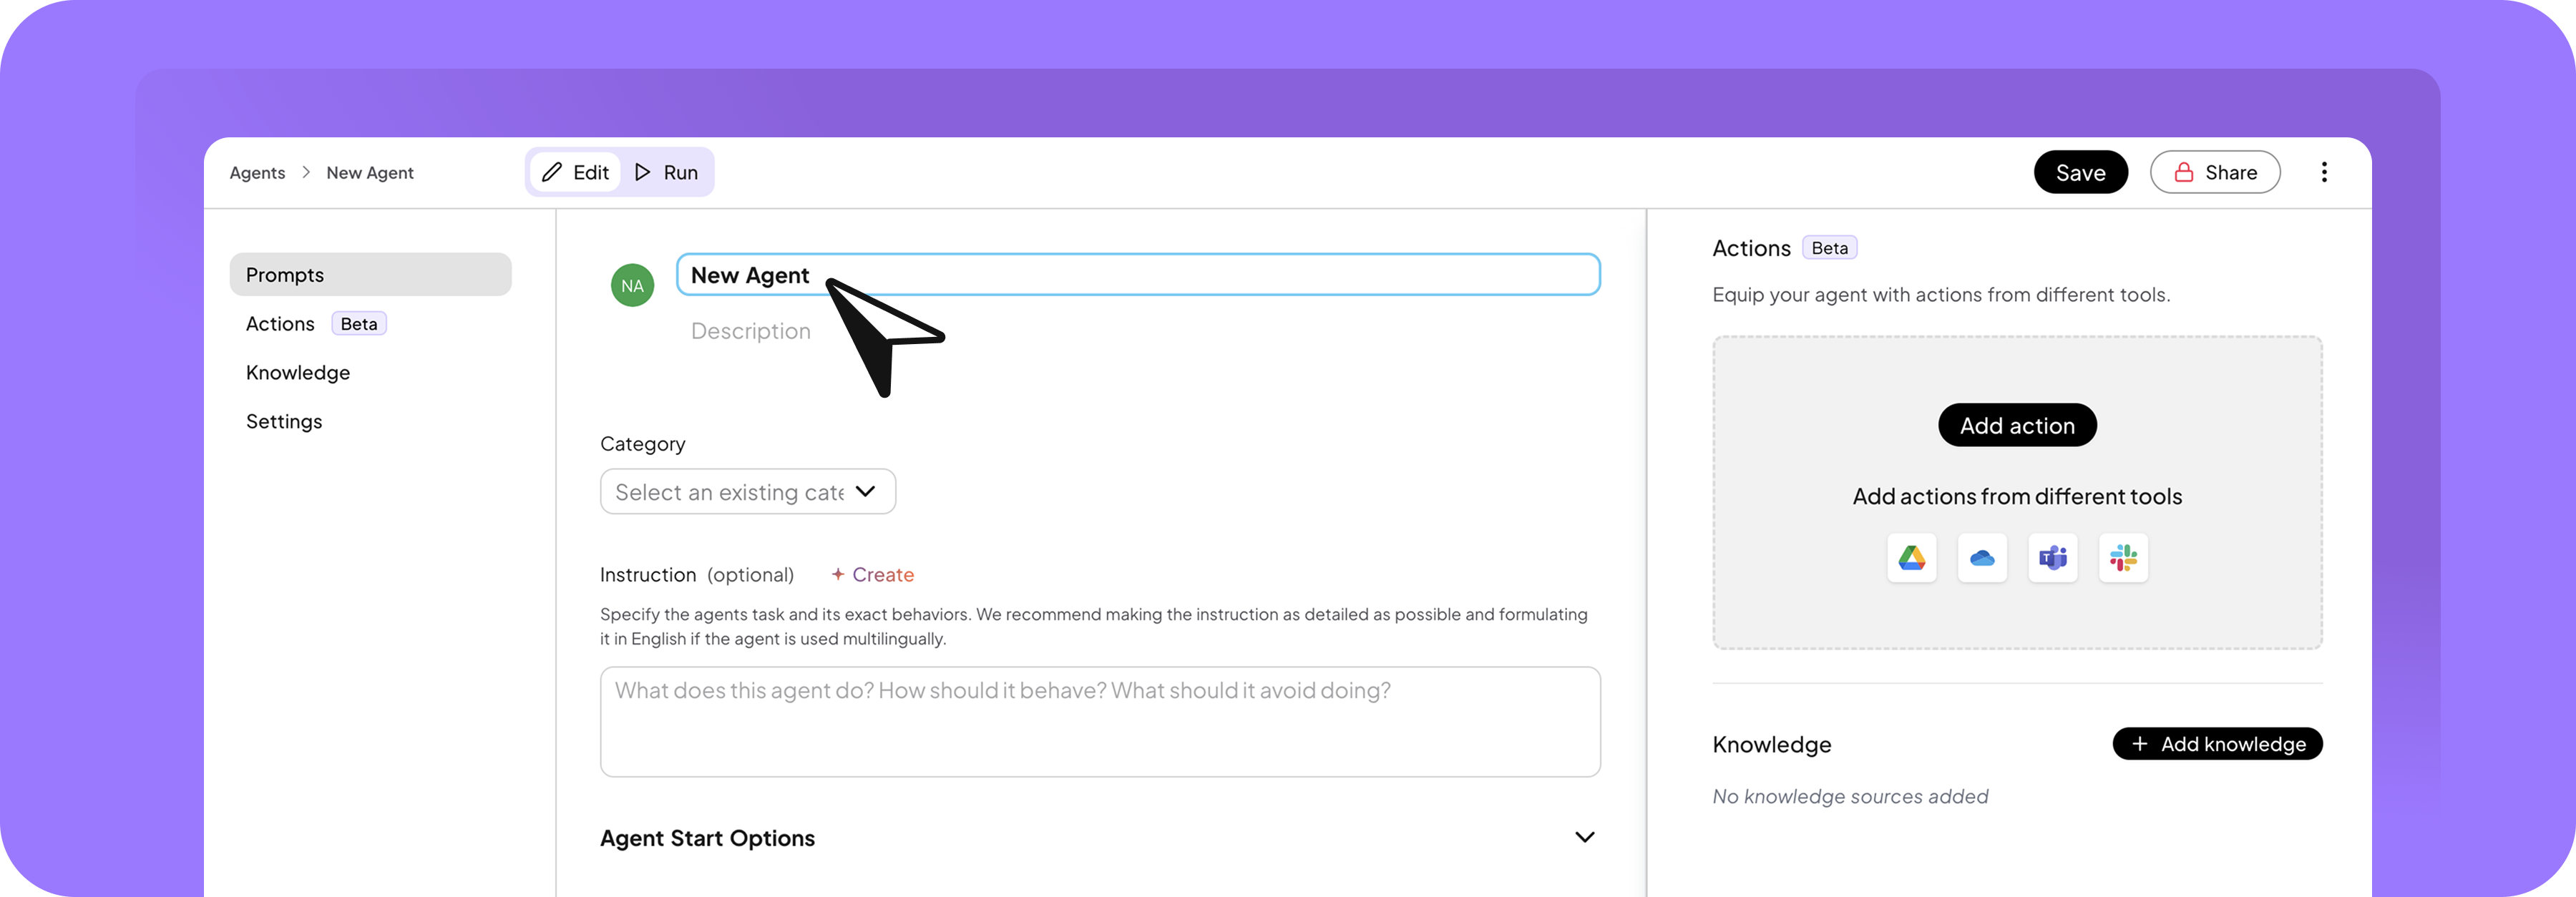
Avatar, Name, Description and Category
- Upload an avatar to give your AI Agent a visual identity
- Enter a name and a short description if the AI hasn’t done this yet
- Choose an appropriate category to keep your agents organized
Instructions
Instructions define how the Agent should respond and what tasks it can handle. Clear instructions help the Agent work effectively and deliver the results you expect. You have two ways to create an instruction:- Generate Instruction with AI: Click “Create” to let the AI generate detailed instructions for you. This is especially helpful if you want to save time or aren’t sure how to phrase your requirements. Based on a short description, the AI creates clear and effective instructions to help your Agent perform reliably.
- Write instructions manually: You can also define the instructions by yourself. This option offers full control and flexibility, allowing specific requirements and details to be added directly. It’s ideal for experienced users who know exactly how their Agent should behave. In the next step, you’ll learn how to write effective instructions using a simple structure.
All of this defines what your Agent should do, how it should respond, and how the results should be structured.
Task
The role defines who the agent is supposed to be. This helps shape the agent’s tone, expertise, and communication style.Example
Serve as an automated messaging assistant for Slack, enabling users to send messages to specific channels or users.
Serve as an automated messaging assistant for Slack, enabling users to send messages to specific channels or users.
Action
The action describes the individual steps an agent should follow. This becomes even more important when additional actions are added. The more clearly the steps are described, the better the output will be.ExampleWhen users request to send a message:
- Ask for the target channel or user to send the message to.
- Provide a preview of the message before sending.
- Send the message promptly to the specified recipient.
- Confirm the message has been sent
Response Guidelines
Response guidelines can define how an agent responds—for example, specifying the tone, writing style, or overall approach.Example
Use friendly and concise language.Ensure clarity in confirming the recipient and message content.Handle errors gracefully, providing troubleshooting steps if the message fails to send.Maintain a record of sent messages for user reference if requested.
Use friendly and concise language.Ensure clarity in confirming the recipient and message content.Handle errors gracefully, providing troubleshooting steps if the message fails to send.Maintain a record of sent messages for user reference if requested.
Goal
A goal defines what the agent is built to achieve for the user. It’s main purpose in one or two clear sentences.Example
Streamline communication within Slack by providing a quick and reliable way for users to send messages, enhancing team collaboration and productivity.
Streamline communication within Slack by providing a quick and reliable way for users to send messages, enhancing team collaboration and productivity.
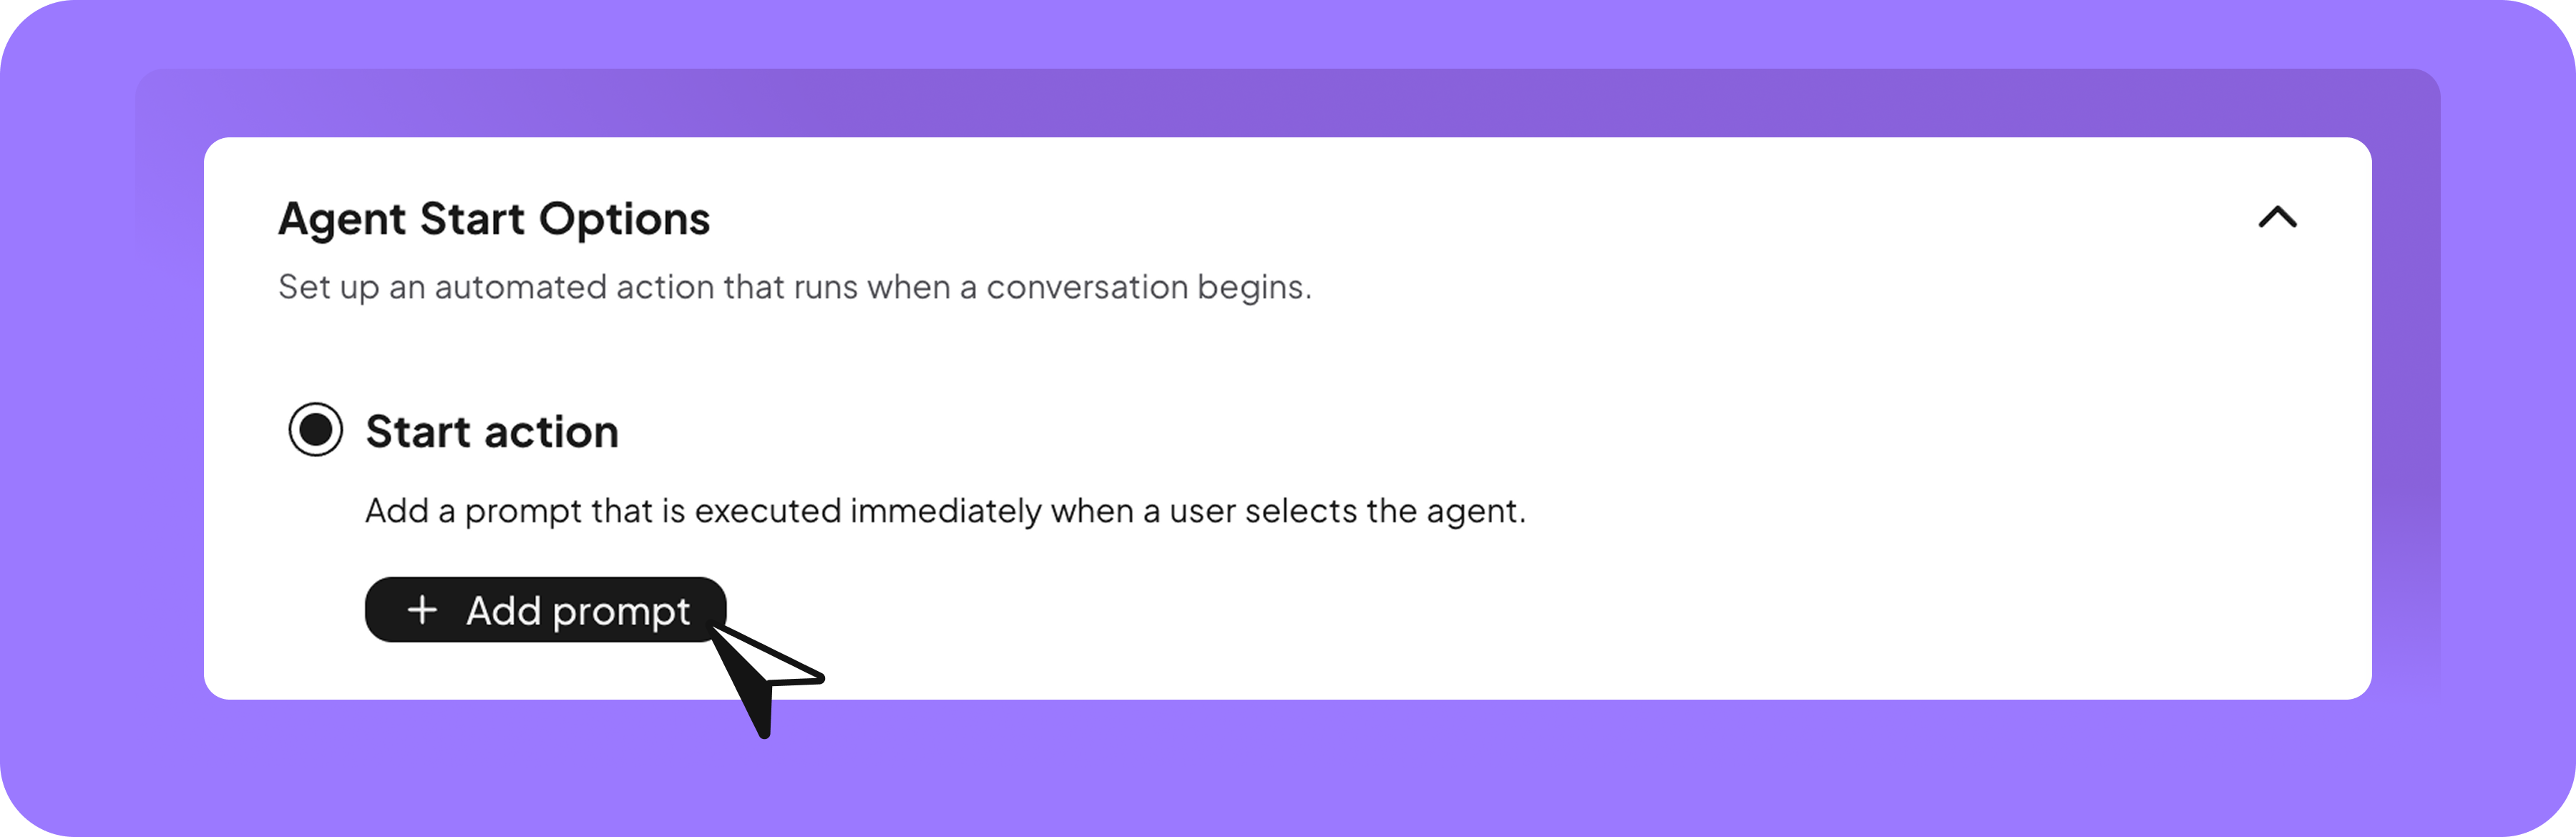
Start Options
When creating an agent, you can define what happens when the agent is selected. This helps guide users from the very first interaction. You have two options:- Start Action
This option lets you trigger a prompt automatically when the agent is selected, also shown as a form to guide user input. Use it when the agent needs specific details to start. It’s ideal for structured, repeatable conversations.
Click “+ Add prompt” to define the initial form.
- Conversation Options
Instead of a fixed start action, you can also set optional conversation elements to make the interaction more flexible and friendly.
These include:
- Conversation Starters: Add up to 4 different starter prompts that appear randomly. These help inspire users by suggesting what they could ask or do.
Click “+ Add prompt” to define the initial conversation starters and provide a welcome message to encourage users to interact.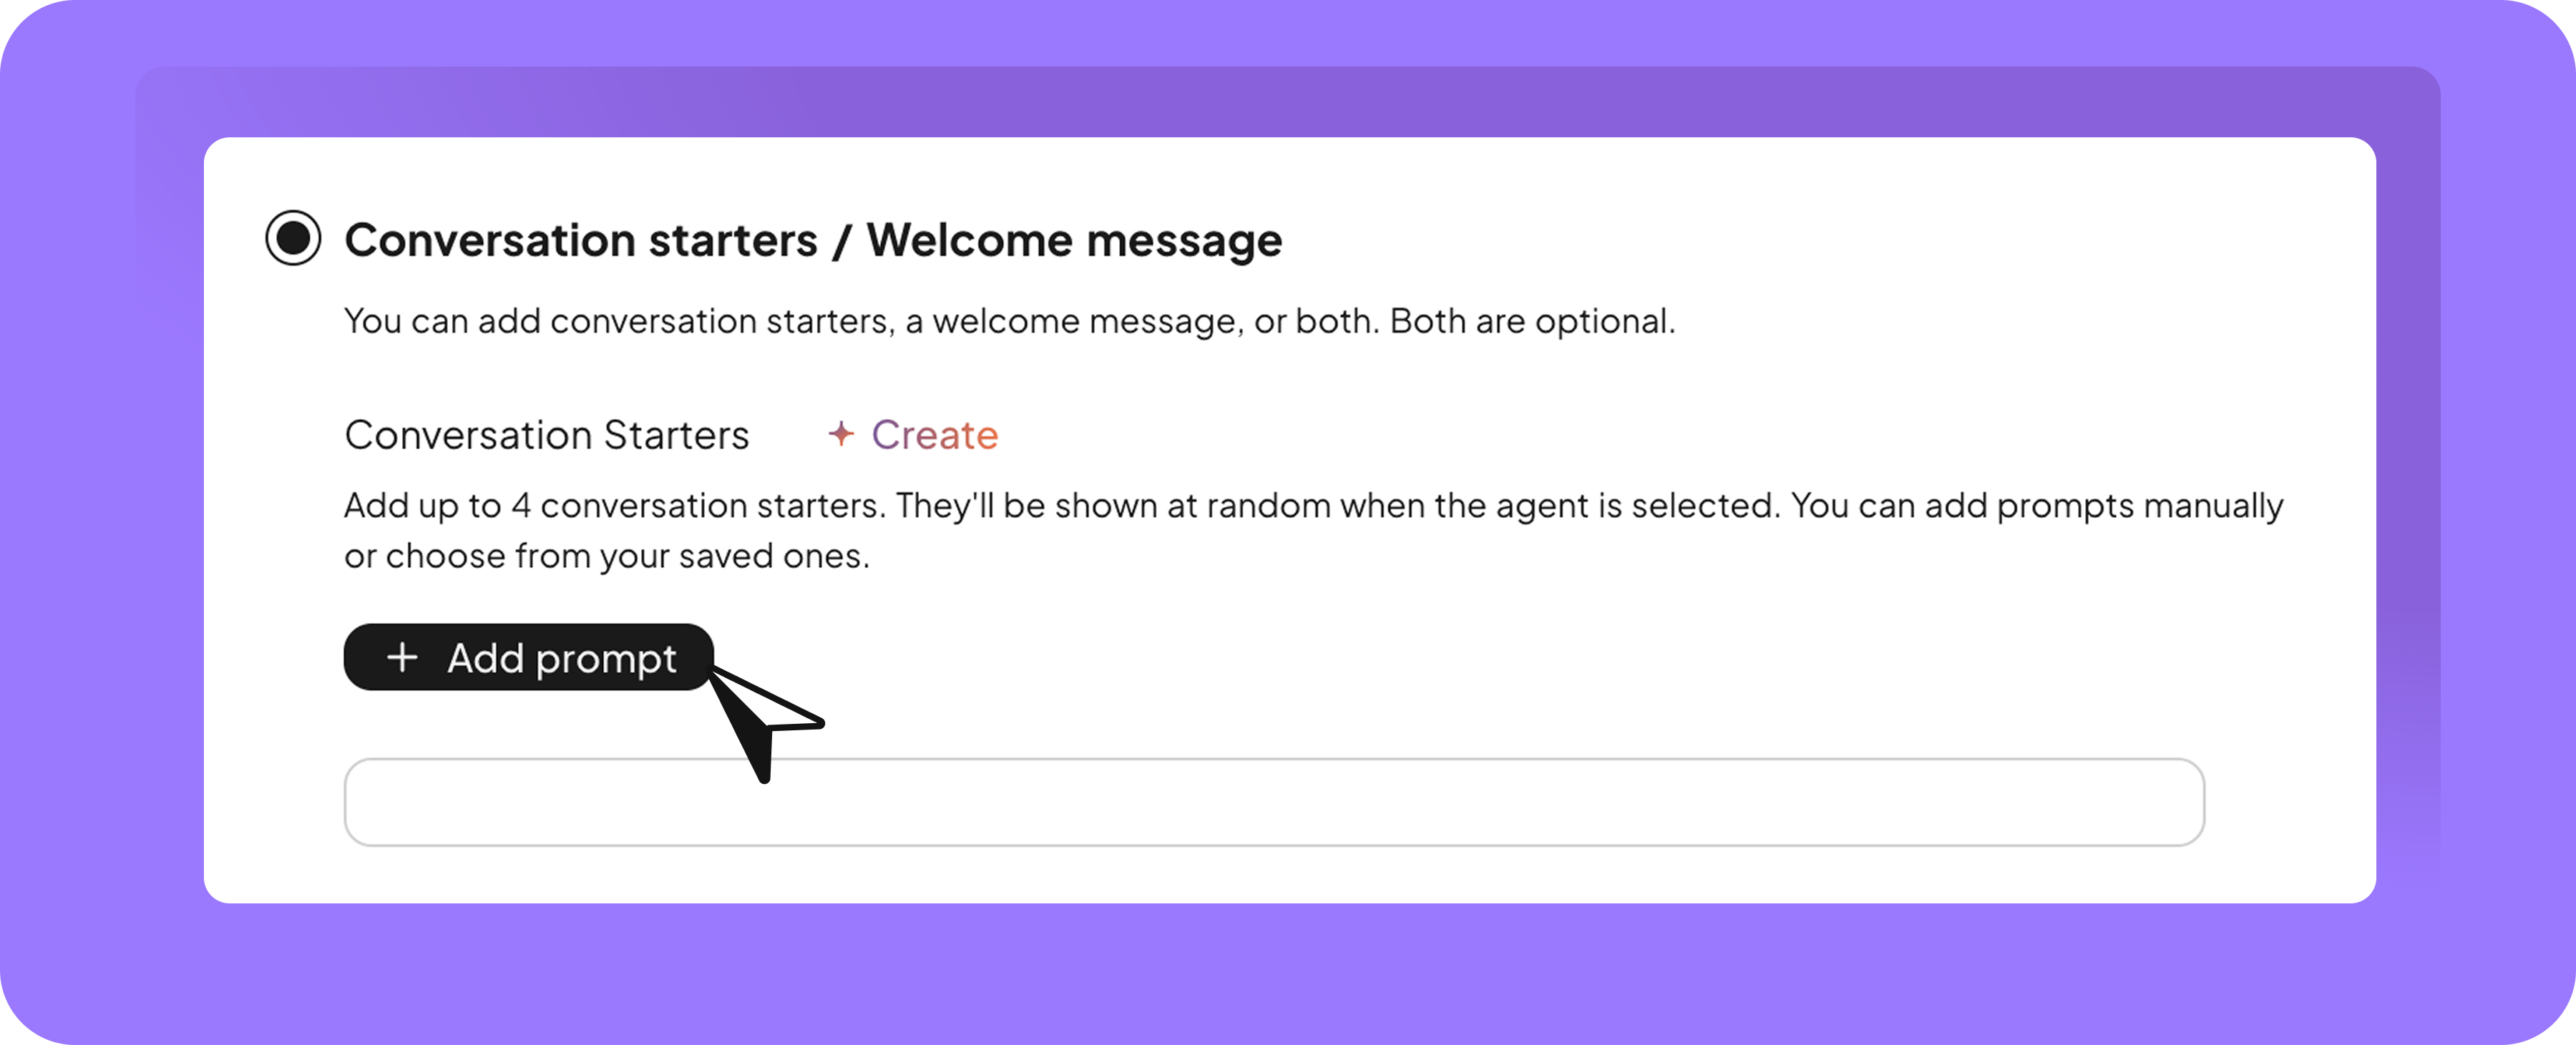
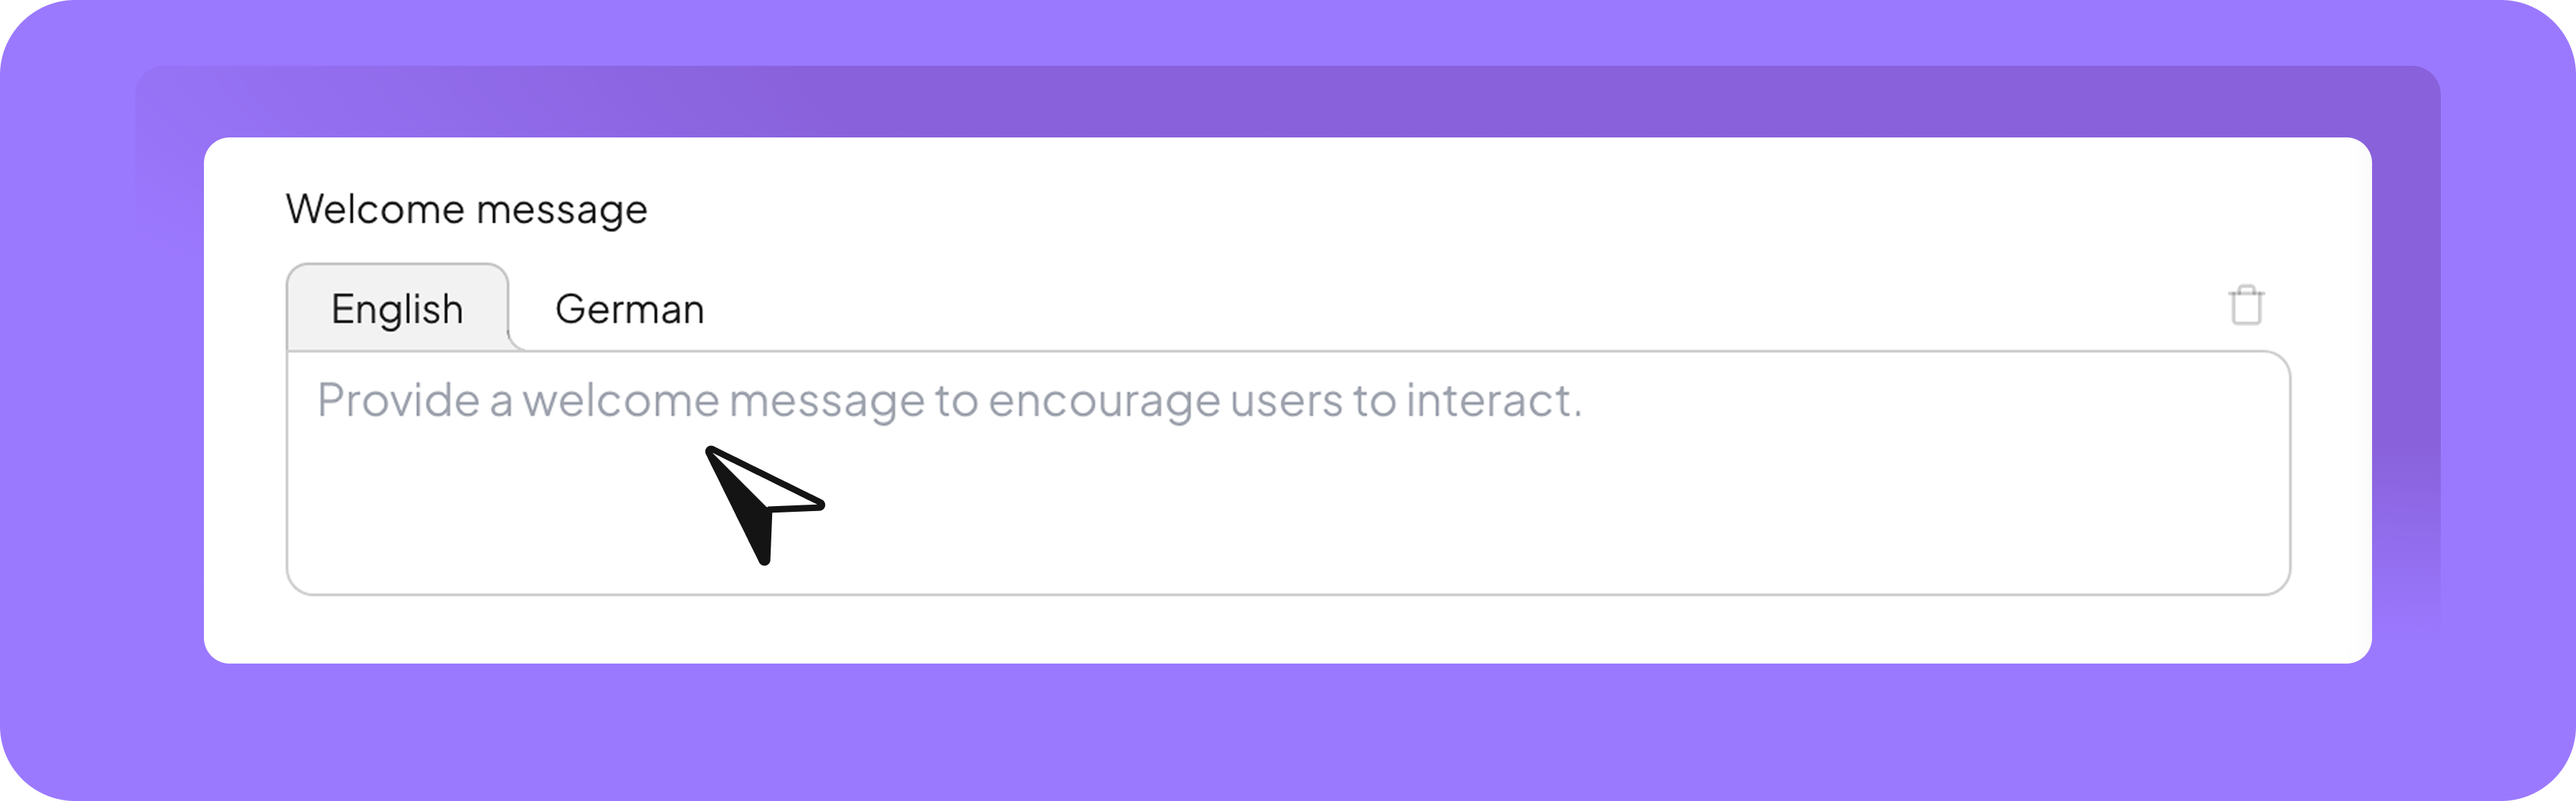
- Welcome Message: Add a short welcome message that encourages users to interact. This is shown when the agent is selected but no action has started yet.
Use this for casual, open-ended interactions where no structured input is needed.
- Conversation Starters: Add up to 4 different starter prompts that appear randomly. These help inspire users by suggesting what they could ask or do.
Actions (Beta)
With Actions, your agents can connect to tools like Slack, Google Drive, Microsoft Teams, and more — so they don’t just respond, but also get things done. Whether it’s sending messages, managing calendars, or accessing files, you can automate entire workflows directly in the chat.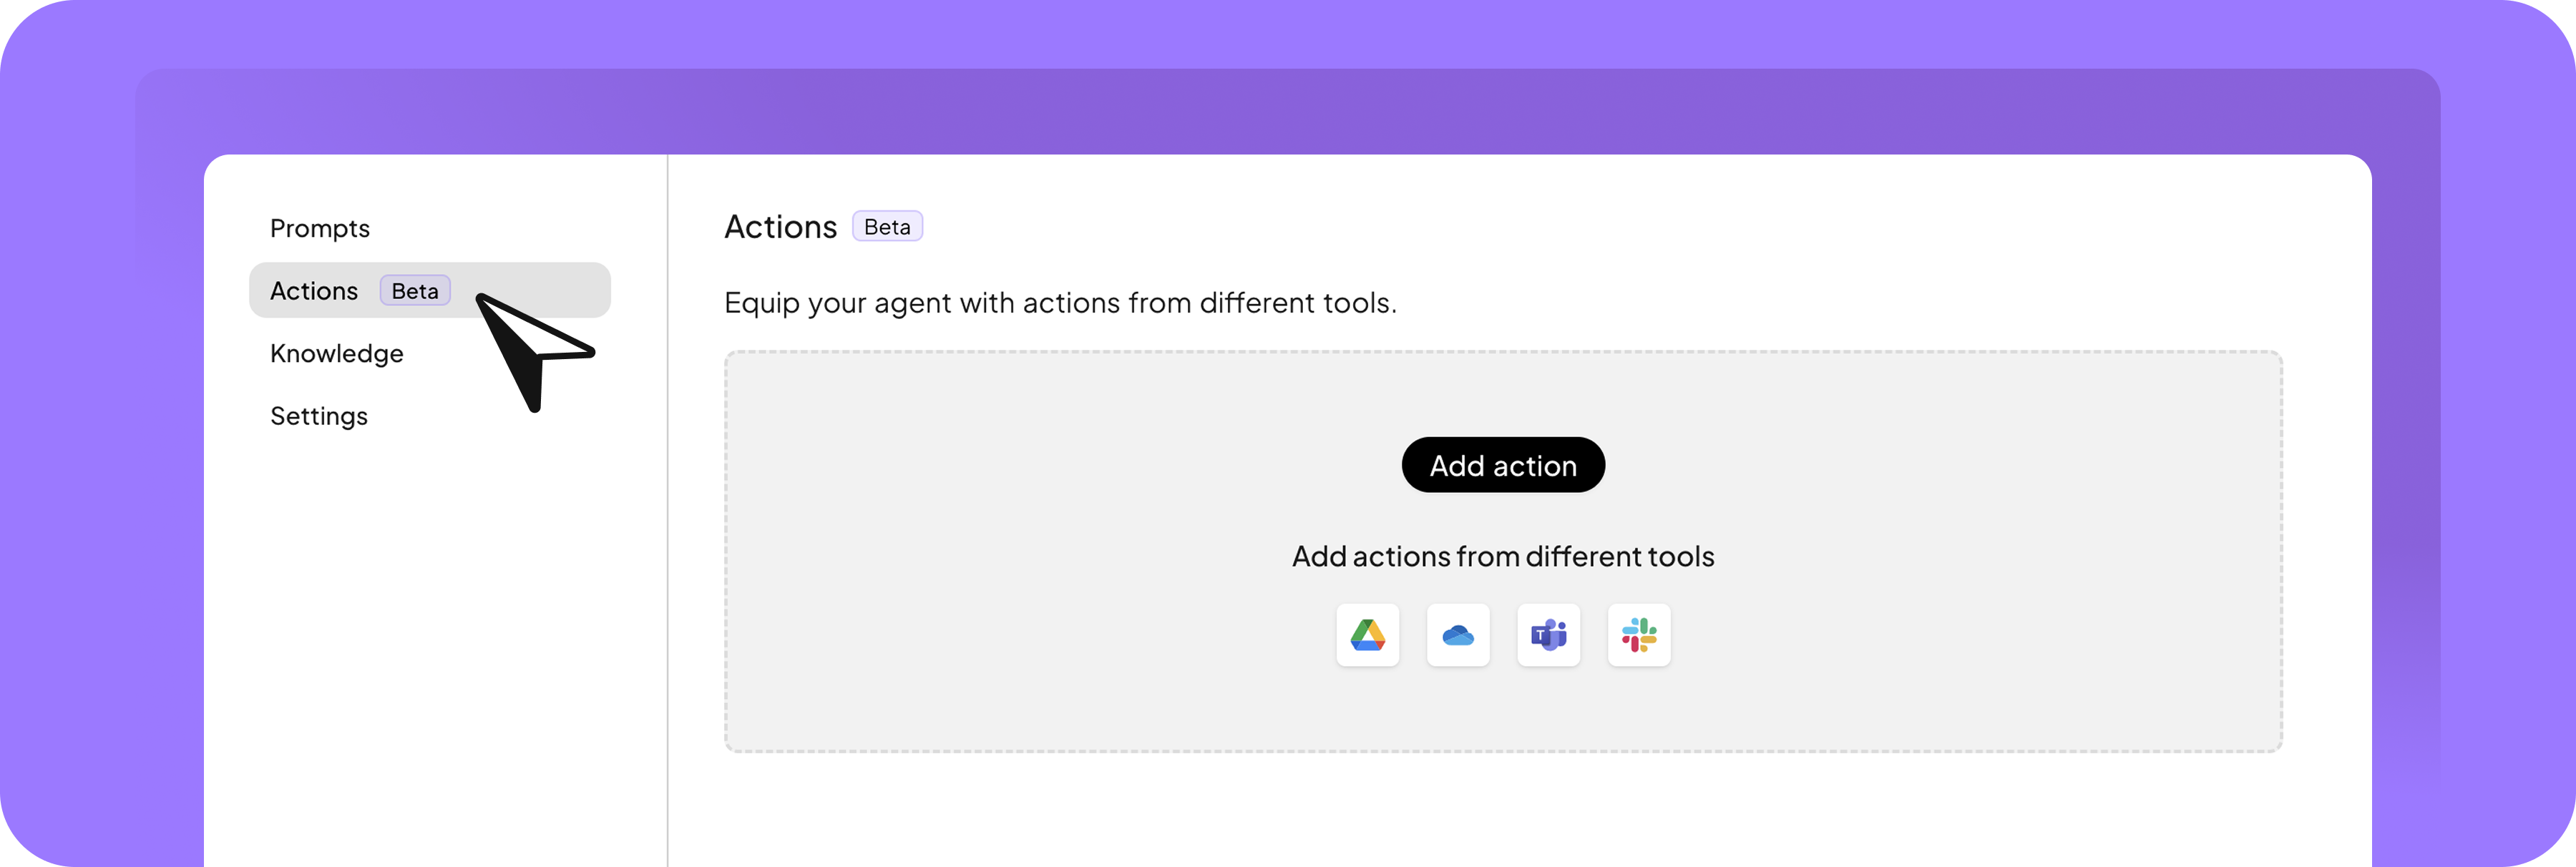
- Slack – send messages, notify channels
- Microsoft Teams – send messages, notify channels
- Gmail – draft or send emails
- Google Calendar – access, add, or update events
- Google Drive – retrieve files, add documents
- SharePoint – retrieve files, add files
- OneDrive – manage documents
👉 Read the full article to explore all connectors and use cases.
Knowledge
Providing knowledge helps your agent generate more accurate, relevant, and context-aware responses — especially when working with company-specific information. Example: A support agent directly accesses stored product documentation and FAQ documents with every response and formulates customer answers exclusively based on these linked contents.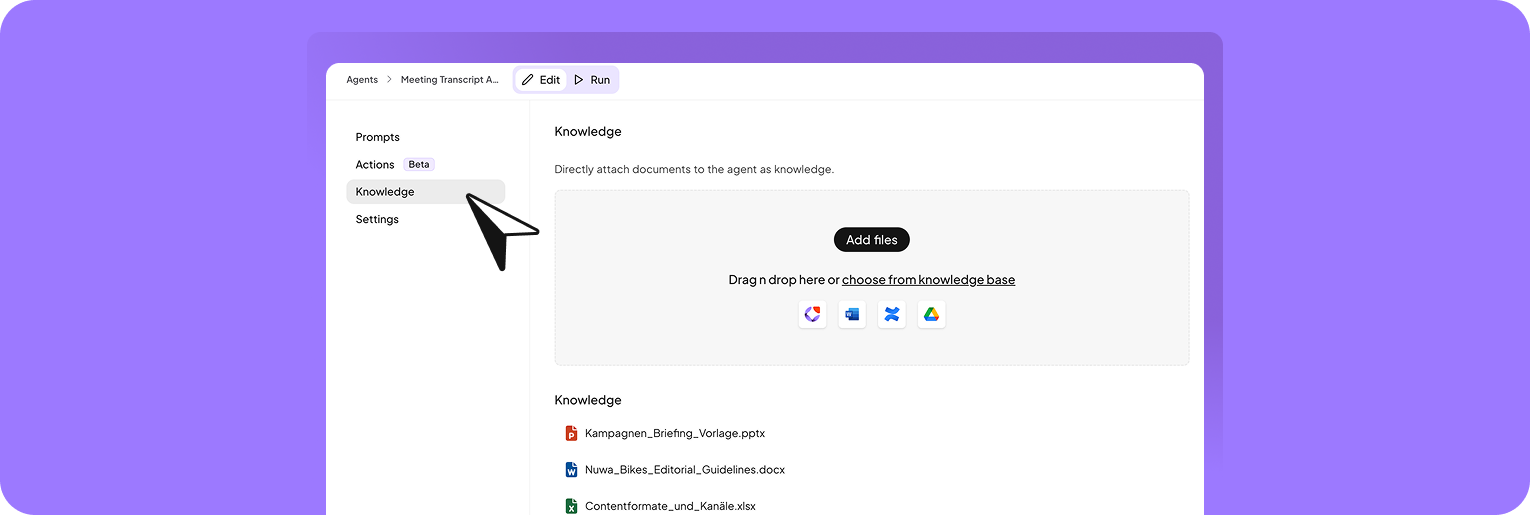
- Upload files – Upload new documents directly.
- Use “My Files” – Select already existing personal files.
- Include Knowledge Folders – Add complete knowledge folders, individual subfolders, or specifically selected files.
Changes in workspace folders are automatically applied to all linked agents. Manual updating in individual agents is not required.
Settings
In the Settings tab, you can fine-tune how your agent behaves and interacts with users. These options help you customize the tone, intelligence, and availability of your agent.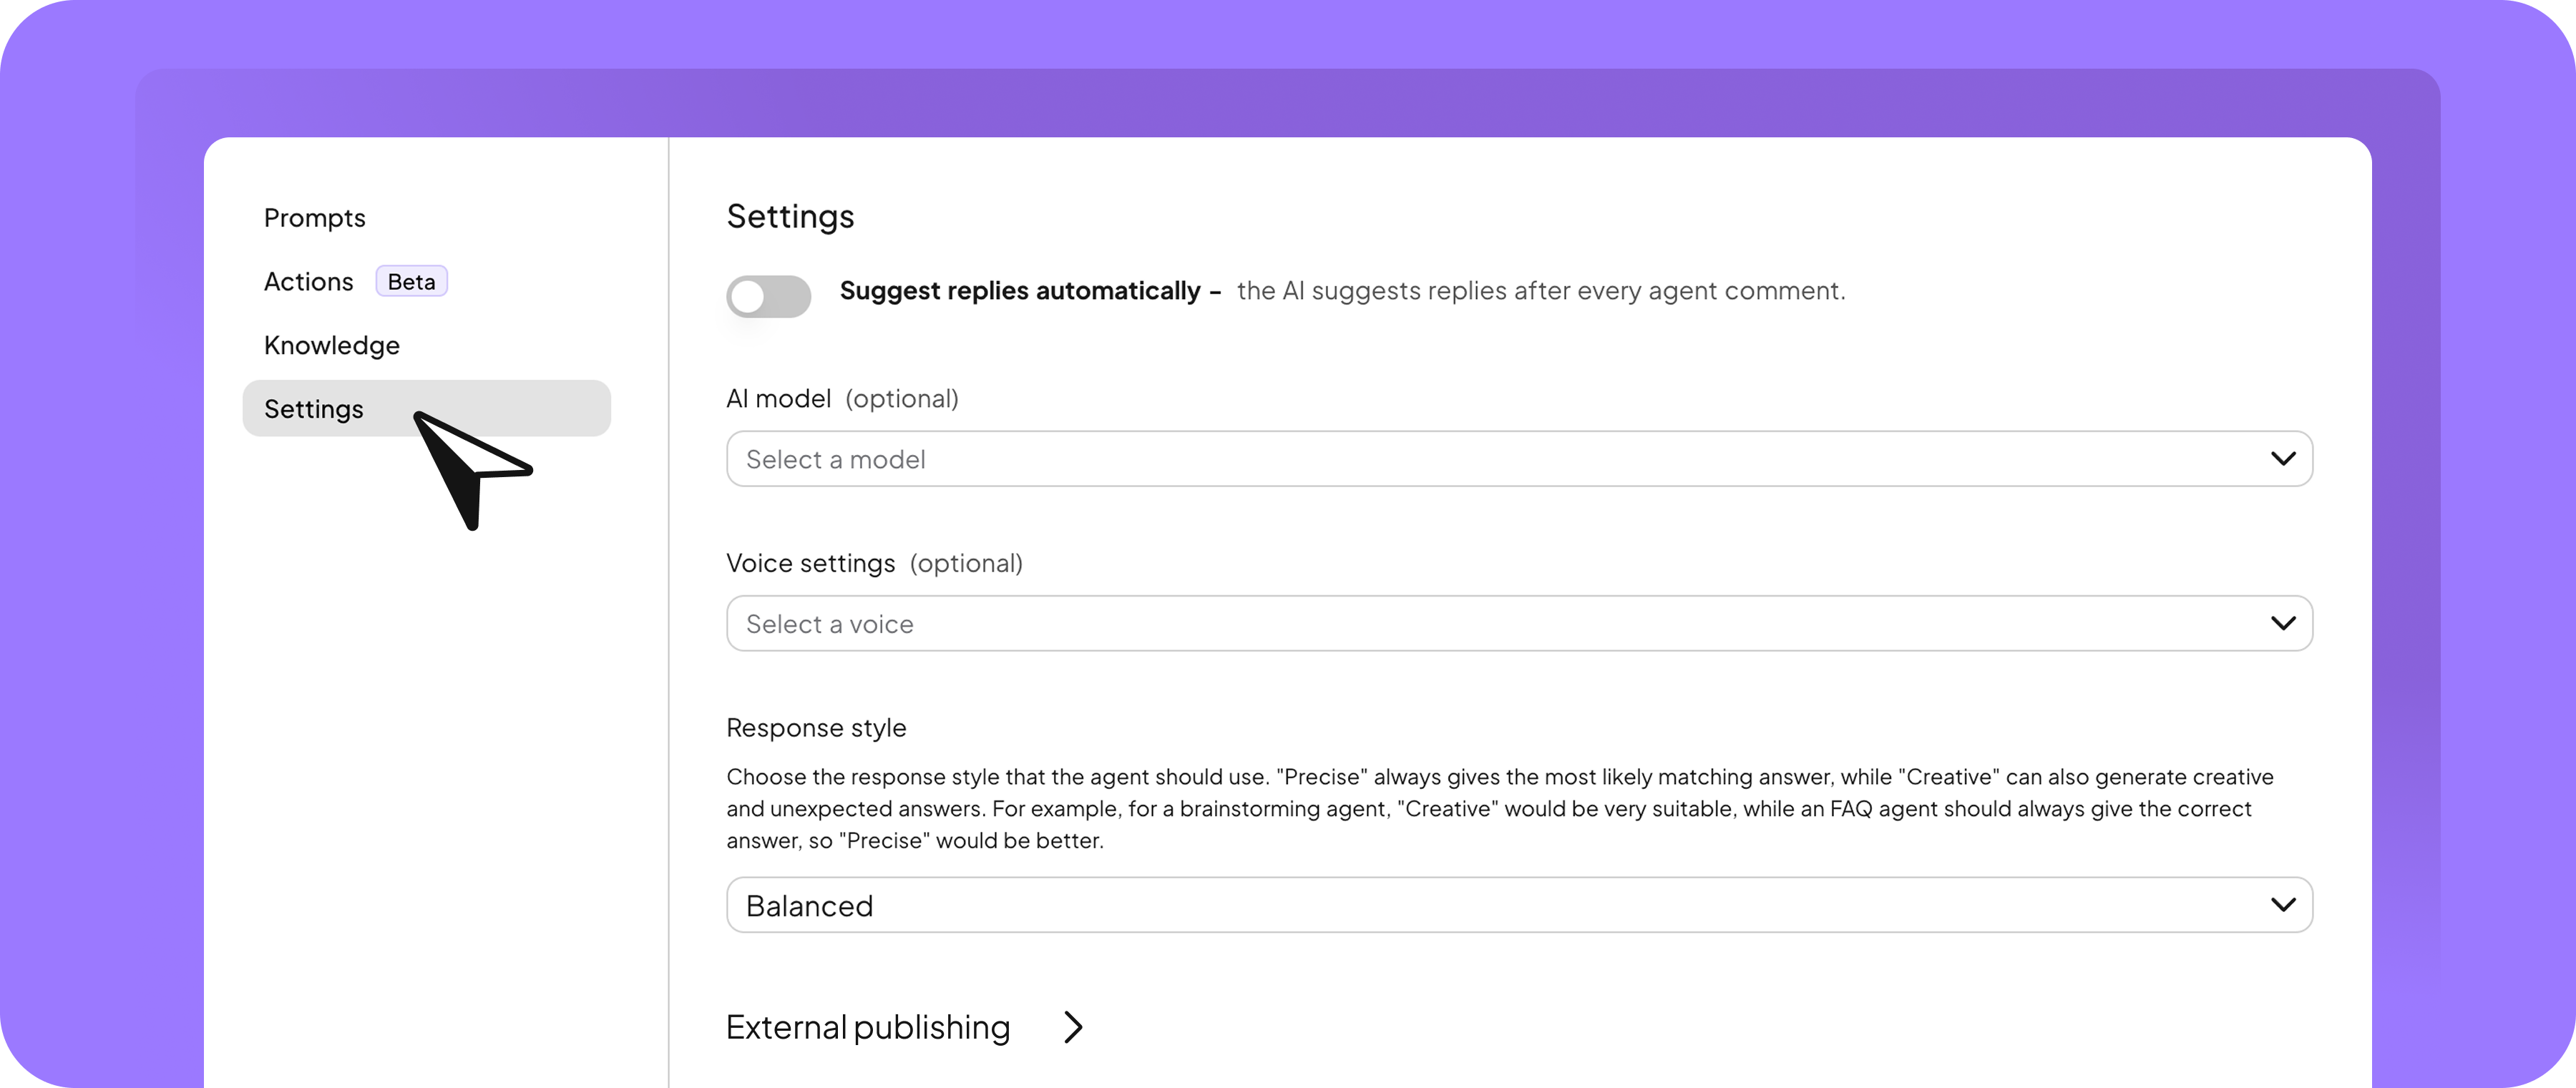
Suggest replies automatically
Let the AI suggest a response after each agent message to keep conversations flowing smoothly.AI model
Choose a specific model for the agent to use — useful if you want consistent capabilities or responses. Learn more about AI models 🔗here.Voice settings
Select a voice that matches your brand or preferred tone for agents.Response style
Decide how the agent should answer:- Precise → for accurate, factual responses
- Creative → for brainstorming or open-ended tasks
- Balanced → a mix of both
- Custom → manually adjust temperature and top-p for full control over creativity and consistency
Publish agent externally
You can embed your agent outside your workspace, for example on a website using a widget or iFrame. Enable external publishing Scroll to the “Publish agent externally” section and turn on the toggle to activate external publishing. Define allowed domains Enter one or more domains in the domain whitelist to control where your agent can be embedded.Example: https://yourcompany.com Click Save to apply the domain restrictions. Choose your embed option: Option A: iFrame
Create a full-screen conversation experience, ideal for in-depth interactions or support use cases.
Once the agent is published, copy the iFrame code and paste it into your website’s HTML where the agent should appear. Option B: Widget
Add a floating AI chatbot to your website for quick assistance without disrupting the user experience.
Once the agent is published, copy the widget code and place it just before the closing </body> tag of your site. Note: You must publish the agent before the embed code is available. Test the integration Visit your website and check if the agent loads correctly. Make sure the styling matches your settings, responses work as expected, and domain restrictions are applied properly.
Need help with embedding? Contact our support team — we’re happy to help.
Testing the agent
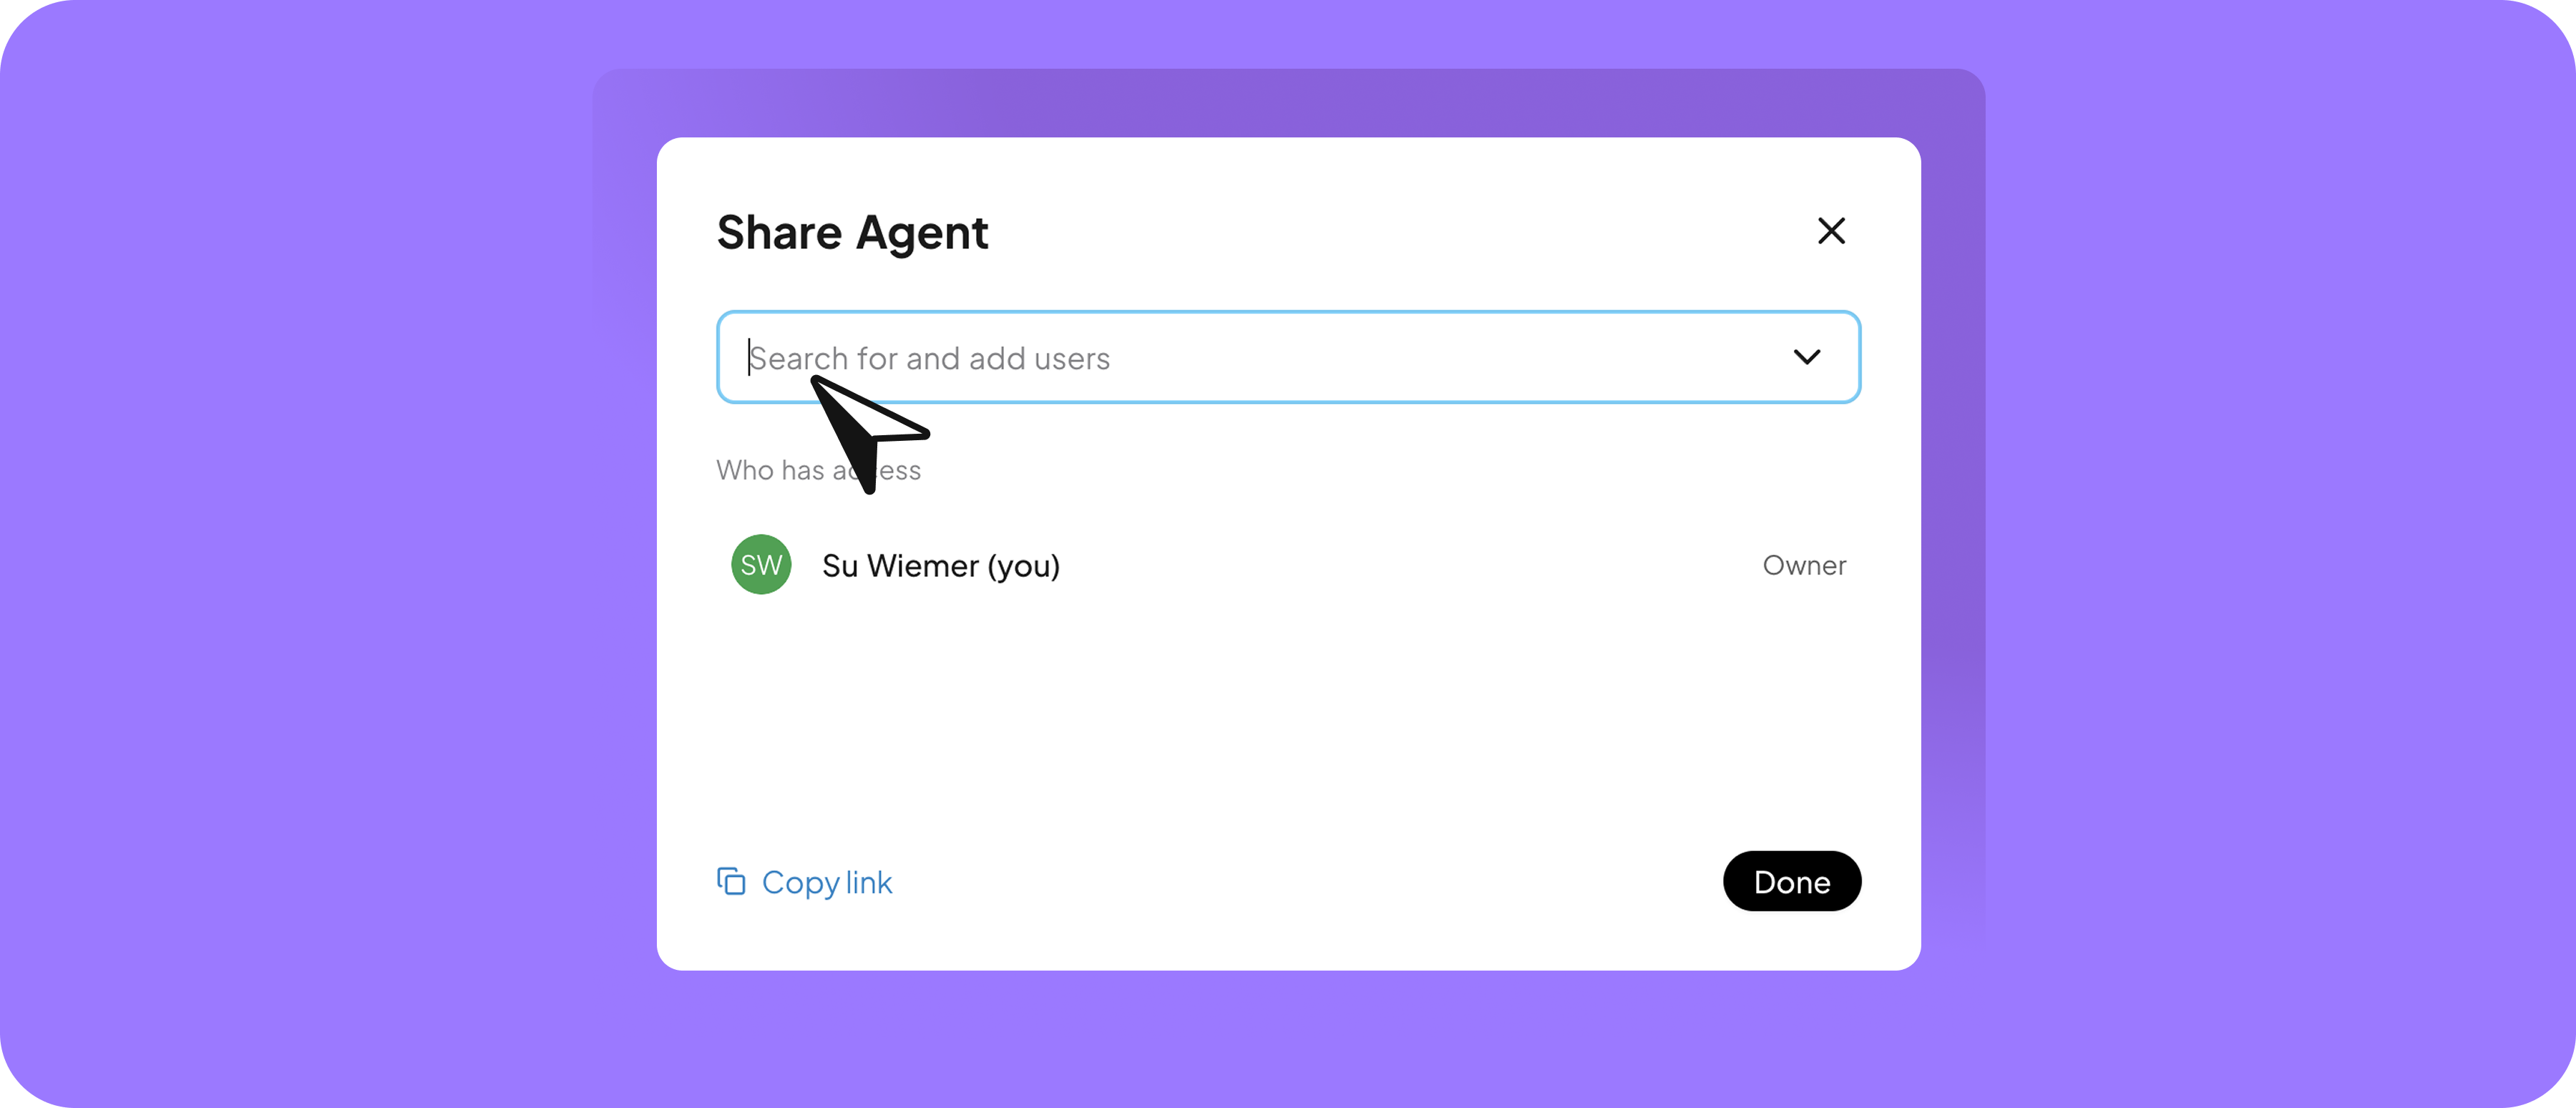
Test your agent as you build it and again once it’s configured. Use the “Run” preview to check how it performs and fine-tune the instructions. It’s completely normal to iterate. If something doesn’t work as expected, try describing it more clearly or rewrite the part that’s not doing what you want. Run through a few typical use cases to make sure your instructions work in different situations.Saving and sharing the agent
Once your agent is published, you can keep it private or share it with others. Click the Share button to make it available in your workspace or share it with specific people.When sharing an agent with attached prompts, please make sure to share the prompts as well. When sharing an agent with actions, please also consider permissions. Should the users you share the agent with set up their own accounts, or should they use yours?