
Overview
Key Benefits
- Decisions, action items, and owners are captured automatically. No manual note-taking required.
- Meeting summaries are indexed and searchable alongside all other workspace content.
- Team members who did not attend can catch up from the structured summary without watching a recording.
- Meeting knowledge feeds directly into AI chat, agent contexts, and projects.
When to Use Notetaker
The Notetaker is relevant whenever consistent, structured documentation of meetings matters:- Internal team meetings where decisions and follow-ups need to be tracked.
- Customer and sales calls where commitments and next steps must be captured and searched later.
- Recurring stand-ups or weekly team meetings where a consistent summary format is required.
- Any meeting where not all stakeholders can attend live.
What You Can Do With It
- Review and edit the structured summary under Recent notes after each call.
- Create and send follow-up emails automatically based on the summary.
- Generate action items and transfer them to your calendar.
- Use meeting notes as a knowledge source in Chat or Projects.
- Share meeting notes with colleagues for transparent collaboration.
- Regenerate the summary using a different template at any time.
Recent Notes
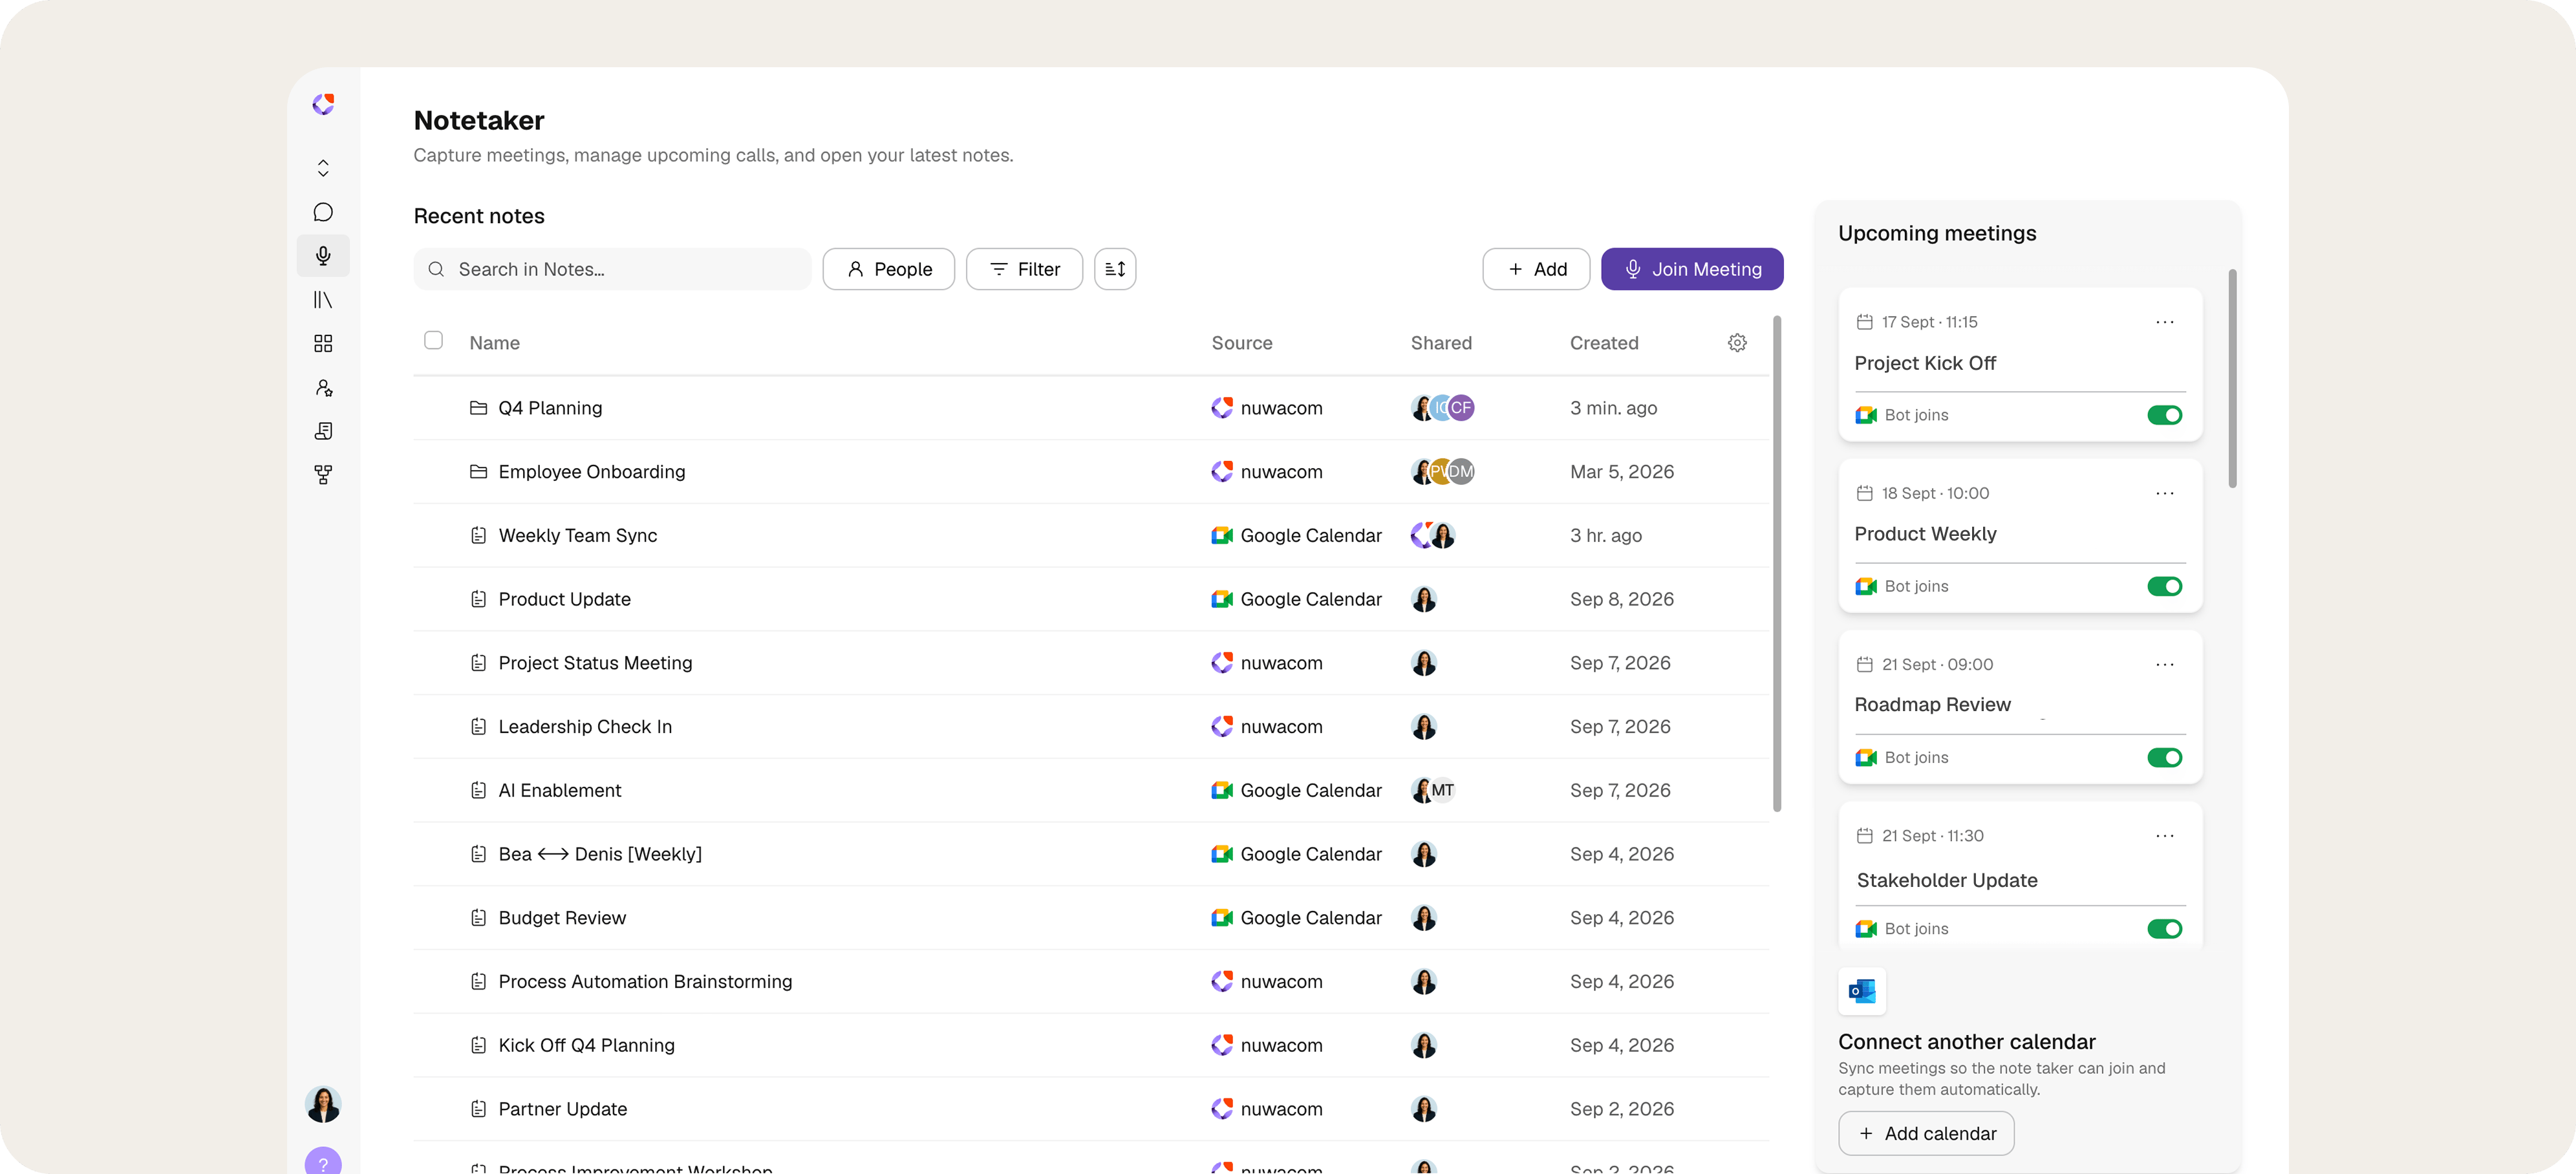
The Recent Notes section provides an overview of the notes available in the workspace. It includes notes generated by the Notetaker as well as notes created manually.Find and filter notes
Three controls are available to narrow the list: People — Opens a searchable list of all workspace members. Selecting a person filters the notes list to show notes where that person is either the creator or a shared recipient. The “All,” “Creator,” and “Shared with” tabs narrow the scope further. Filter — Opens a filter panel with three categories:
Each category expands into its own sub-panel and can be combined with the others.
Table columns
The table can be sorted by clicking a column header to toggle between ascending and descending order.
Use bulk actions
Select the checkbox next to one or more notes to open the available bulk actions:
The bulk action menu appears after selecting at least one note.
Add note
The Notetaker provides a dedicated editor for capturing, formatting, and managing notes in nuwacom. Notes can be written manually, generated from a recording, or created from a connected calendar. Notes can also be shared, exported, or used to start a new chat.- Select + Add.
- Select Add note.
- Enter the note content in the editor.
Note editor
The note editor provides a workspace for writing, formatting, and managing notes.- Enter a title in the New Note field.
- Add content in the editor.
- Use the formatting toolbar to format the content.
- Select a text style from the Text menu.
- Apply cursive, underline, or strikethrough formatting.
- Highlight text.
- Create bulleted or numbered lists.
- Add links.
- Insert tables.
- Copy note content.
Record note
A note can be generated from a live recording. The spoken content is captured in the Transcript panel and converted into an AI Note.- Start the recording and speak the content.
- Pause or resume the recording when needed.
- Select Generate note to convert the transcript into a structured AI Note.
Share note
Select Share to control who can access the note. Sharing gives others access to the same note, so collaborators can work with one shared version instead of separate copies.Manage note
The note header provides the following actions:- Share: Share the note.
- Continue: Start a new chat based on the note content.
- More options: Open additional note actions.
- Close: Exit the note editor.
- Open the note in Google Docs.
- Open the note in Word.
- Move the note to a project.
- Download the note as a DOCX file.
- Download the note as a PDF file.
- Delete the note.
How to connect a calendar
The following steps connect a new calendar so the Notetaker can capture meetings automatically. The flow applies to Google Calendar and Microsoft Outlook.Please ensure that all participants have given their consent before meeting notes are recorded automatically.
- In the Notetaker, open the “Connect additional calendar” area.
- Select the ”+ Add calendar” button.
- Choose the provider: Google Calendar or Microsoft Outlook.
- In the provider’s sign-in window, select the account to connect. If the account is not listed, add it via “Use another account.”
- Confirm the sign-in and review the requested permissions. Calendar permissions are required for automatic joining, including “See and edit events on all your calendars.”
- Confirm access with “Allow.”
- In the “Get insights from your meetings” dialog, select the appropriate join rule.
- Apply the selection with “Save.” “Cancel” closes the connection without changes.
Add Notetaker via meeting link
Alternatively, the Notetaker can be invited to any ongoing or upcoming meeting. Meeting links from Microsoft Teams, Google Meet, Zoom, and Webex are supported.Please ensure that all participants have given their consent before meeting notes are recorded automatically.
How it works
- Open the Notetaker.
- Select Join Meeting
- Paste the meeting link
- Enter a meeting name (optional)
- Set the date and time
- Select “Add Notetaker” to confirm.
Join rules
When connecting a calendar and in the calendar settings, the option “The Meeting Notetaker joins:” defines which meetings are recorded. Six rules are available:- Join all meetings: The Notetaker joins all meetings in the calendar.
- Join all accepted meetings: The Notetaker joins all meetings you have accepted.
- Join meetings I organize: The Notetaker joins all meetings you host.
- Join internal meetings: The Notetaker joins all meetings held internally within your organization.
- Join external meetings: The Notetaker joins all meetings that are external to your organization.
- Join when invited: The Notetaker joins only when it is added manually.
Supported Platforms
Bot Commands During Meetings
Control the Notetaker via chat commands during the meeting:Meeting Summary Templates
nuwacom includes pre-built templates to structure summaries for different meeting types:- Default Template: General-purpose summary.
- 1:1 Meeting Summary: Focused on individual check-ins.
- Customer Discovery Summary: Captures customer insights and feedback.
- Daily Stand-Up Summary: Status updates, blockers, and next steps.
- Weekly Team Meeting Summary: Topics, decisions, and action items.
- Brainstorm / Strategy Session Summary: Ideas, themes, and conclusions.
Summary Content
Each generated summary includes:- Meeting Overview: High-level recap.
- Participants: Who attended, with roles where identifiable.
- Discussion Topics: Organized by theme or domain.
- Decisions: What was agreed upon.
- Action Items: With owners and deadlines.
Security and Data Privacy
- The Notetaker announces itself upon joining and informs all participants that the session is being recorded and summarized.
- No audio or video recordings are stored. Only the text transcript and the generated summary are retained.
- All meeting data is processed and stored within the EU.
- Calendar sync, transcription, and summary generation run exclusively on EU-based infrastructure.
- Meeting data is scoped to the workspace it belongs to. Only workspace members with the appropriate permissions can access summaries.
- Role-based access control applies: editors and above can manage meetings; readers can view summaries.
- Transcript data sent for summary generation is not used for model training by the AI provider.
FAQ
Can multiple people from the same workspace use the Notetaker in the same meeting?
Can multiple people from the same workspace use the Notetaker in the same meeting?
Yes, but each person’s Notetaker bot will join the call separately, resulting in multiple bots. To avoid this, coordinate who enables the Notetaker per meeting, or use the “Manual only” attendance setting and designate one person to activate it.
What happens if my meeting does not have a link in the calendar event?
What happens if my meeting does not have a link in the calendar event?
The Notetaker requires a meeting URL to join. Calendar events without a meeting link are skipped automatically.
Can the summary be regenerated after a meeting?
Can the summary be regenerated after a meeting?
Yes. The summary can be regenerated at any time using a different template, without re-running the meeting.
Is the Notetaker limited in how many meetings it can process?
Is the Notetaker limited in how many meetings it can process?
The Free Trial covers 5 meetings. Team and Enterprise plans include unlimited meetings when the meeting feature is enabled.
Can the transcript be downloaded?
Can the transcript be downloaded?
Yes. The transcript can be copied or downloaded from the Transcript panel.