> ## Documentation Index
> Fetch the complete documentation index at: https://docs.nuwacom.ai/llms.txt
> Use this file to discover all available pages before exploring further.
# Videos
Create videos in seconds directly in nuwacom, without a camera or editing tools.\
Simply describe your video, optionally choose format and style, and seamlessly integrate the generated video into your workflows.
With AI videos, you can:
* Present content in a clear and visual way
* Create marketing, recruiting, or product videos
* Test and iterate ideas quickly
* Save time and costs on video production
## **How to create a video**
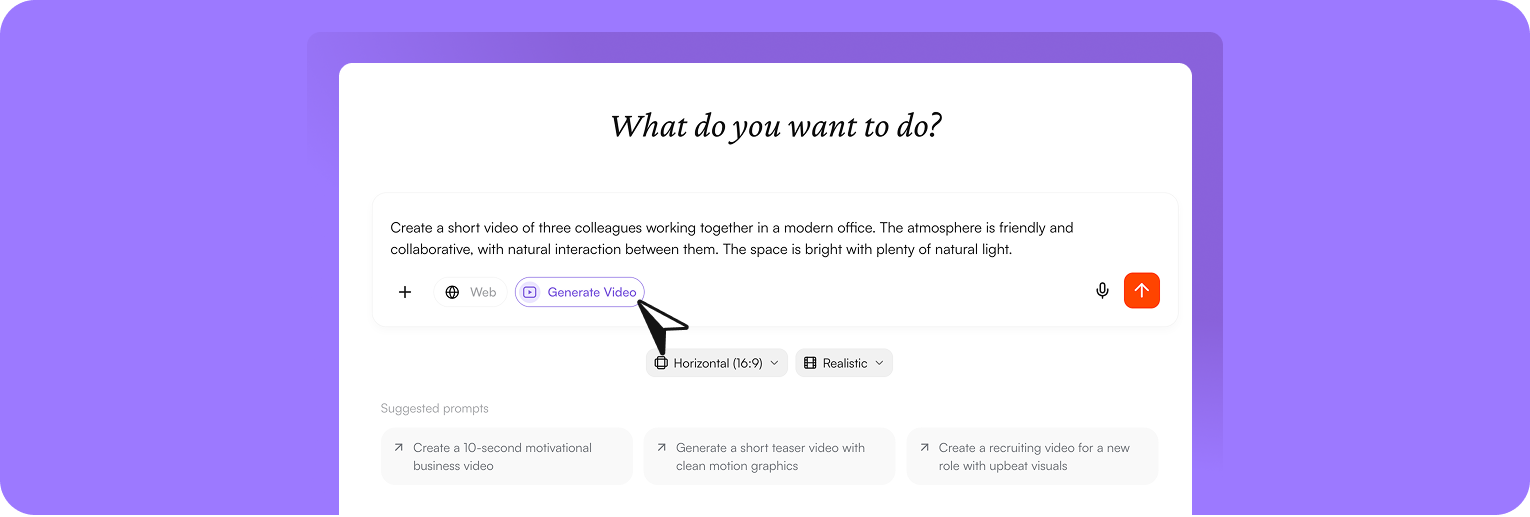 Open the chat and select “Generate video” to start creating your video.
Clearly describe what your video should look like, for example: *“Create a realistic video of two colleagues working together on a laptop. Modern office, natural interaction, smooth camera movement, professional look.”*
Optionally adjust format or style to further refine the result.
Send your request and receive a finished video within seconds.
## **Chose format and style**
You can control your video before generation:
**Choose format**
* Horizontal (16:9), ideal for presentations or websites
* Vertical (9:16), suitable for social media
**Define style**
* Realistic
* Cinematic
* Motion graphics
* Animated
This allows you to tailor the video to your specific use case.
## **Integrate video into your workflow**
After creation, you can directly continue working with your video and integrate it into your existing processes:
**Download video**\
Download the finished video and use it for presentations, social media, or external communication.
**Transfer content into a document**\
Move the video or its description into a document to further develop content, for example for scripts, campaigns, or internal materials.
**Move to a project**\
Assign your video to a project to keep it organized and collaborate with your team.
This ensures your video doesn’t remain isolated but becomes part of your existing workflows.
## **Share and collaborate**
You can share the entire chat including the generated video with others.
This allows colleagues to:
* watch the video directly
* understand the original prompt
* create adjustments or new variations
This is especially helpful for gathering feedback, collaboratively refining content, or sharing best practices within your team.
## **Models**
The following models are available for video generation:
* **Veo 2 (EU)** – EU-hosted, suitable for privacy-compliant usage
* **Veo 3 (US)** – US-hosted
By default, Veo 2 (EU) is used for video generation in your workspace. With the role 'Admin' you can change the model anytime in Workspace Settings > Models > Video Generation Model. This allows you to flexibly choose the model that best fits your use case.
Open the chat and select “Generate video” to start creating your video.
Clearly describe what your video should look like, for example: *“Create a realistic video of two colleagues working together on a laptop. Modern office, natural interaction, smooth camera movement, professional look.”*
Optionally adjust format or style to further refine the result.
Send your request and receive a finished video within seconds.
## **Chose format and style**
You can control your video before generation:
**Choose format**
* Horizontal (16:9), ideal for presentations or websites
* Vertical (9:16), suitable for social media
**Define style**
* Realistic
* Cinematic
* Motion graphics
* Animated
This allows you to tailor the video to your specific use case.
## **Integrate video into your workflow**
After creation, you can directly continue working with your video and integrate it into your existing processes:
**Download video**\
Download the finished video and use it for presentations, social media, or external communication.
**Transfer content into a document**\
Move the video or its description into a document to further develop content, for example for scripts, campaigns, or internal materials.
**Move to a project**\
Assign your video to a project to keep it organized and collaborate with your team.
This ensures your video doesn’t remain isolated but becomes part of your existing workflows.
## **Share and collaborate**
You can share the entire chat including the generated video with others.
This allows colleagues to:
* watch the video directly
* understand the original prompt
* create adjustments or new variations
This is especially helpful for gathering feedback, collaboratively refining content, or sharing best practices within your team.
## **Models**
The following models are available for video generation:
* **Veo 2 (EU)** – EU-hosted, suitable for privacy-compliant usage
* **Veo 3 (US)** – US-hosted
By default, Veo 2 (EU) is used for video generation in your workspace. With the role 'Admin' you can change the model anytime in Workspace Settings > Models > Video Generation Model. This allows you to flexibly choose the model that best fits your use case.